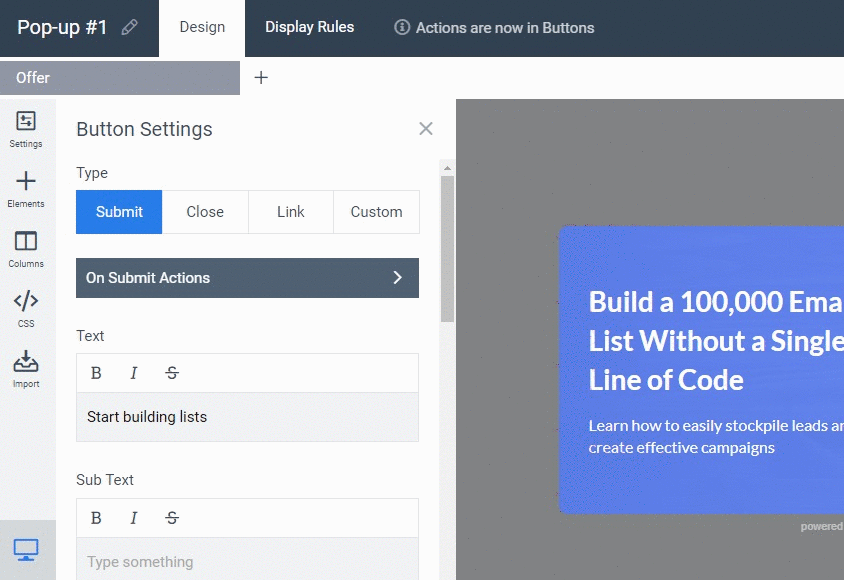
Actions are Now in Buttons
All actions that your widget should perform (including submit actions, integration-related actions, redirects, changing screens, custom JS and others) you can specify by simply editing a relevant button.

To learn more – see the relevant knowledge base article.
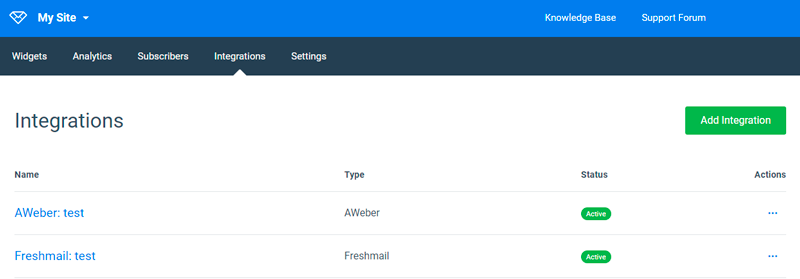
Integrations are Now Connected to Site
Integrations, that were previously connected to your account, are now bound to relevant sites instead. Each site is a separate project and now only displays integrations related to it (i.e. were used in it).
Deeper Integrations
Depending on the integration, you now have access to a bigger arsenal of actions. Add to list, apply/remove tags, adding via forms, notes, groups, subscriber status. Just press the button and take a look at the list of actions your integration now have:
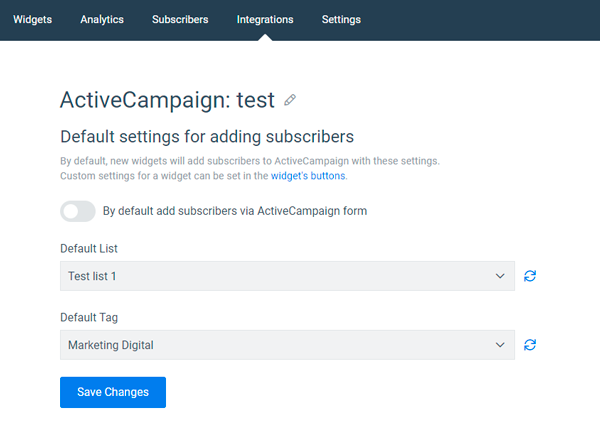
Default Integration Settings
When editing your integration settings, you can now specify a default scenario: default list, tags, form to add subscribers to. And you can use these default settings in your button with a single action: ‘Add subscriber with default settings’.
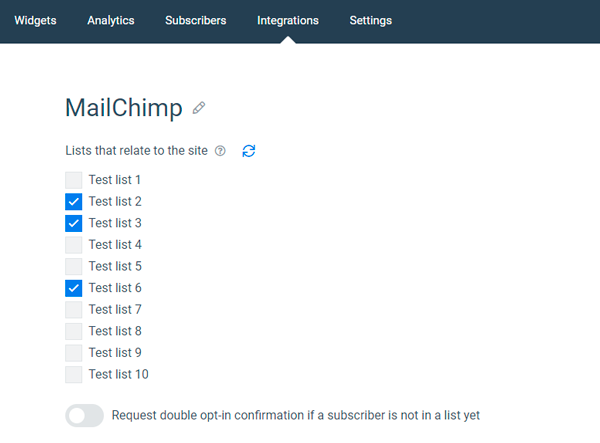
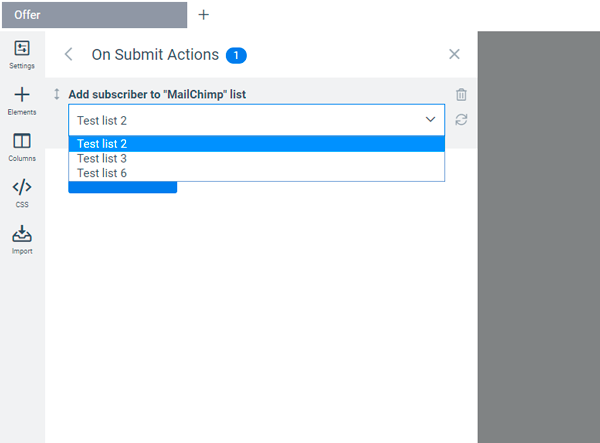
MailChimp Related Lists
When editing MailChimp integration, you can choose lists, that related to this project/site. Thus only relevant lists will be available for the actions you create for this site’s widgets.
Sequences of Actions
While editing your buttons you can now create and combine multiple types of action, using both integration-related ones and actions provided by Convertful functionality. Actions will be performed in a sequence you added them.
Let’s say you want your widget to add a subscriber to a list, add a tag to this subscriber, send a JS event tracking code to your Google Analytics, and redirect to a ‘Thank you’ page after – just add all the actions you need:

Go to URL and Send Data
Go to URL and POST functionality was updated. You can now choose if you want to send variables and their values as an HTTP POST request to the specified URL or just add this data as URL GET parameters instead. Just choose the relevant position of ‘Use POST / Use GET’ switch:
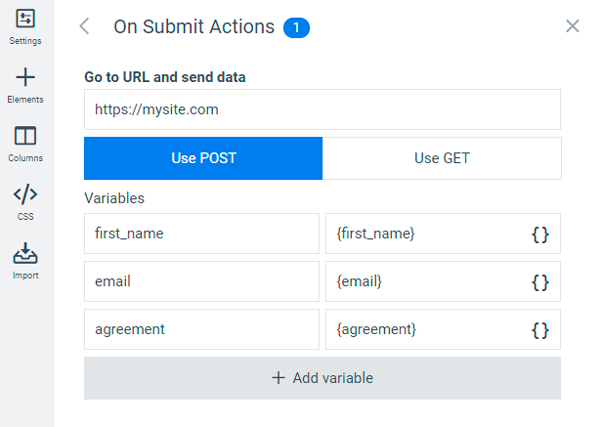
Note that you can press the double square bracket icon and choose dynamic data to send as the variable value or type in the static value manually.
Session-Tracking Actions
Once a visitor subscribed to any of your widgets, the email he provided is stored in his browser session. Thus you may use other widgets to send extra data (tags, custom fields) to this subscriber without asking him to fill in the form again.
You can simply add a relevant tag-adding action to a CTA or a quiz-like widget and it will use the email that was already provided to identify and update subscribers data in the list.
![]()
P.S.
All the widgets you previously created and integrations you used were automatically transferred to a new information format and settings. You don’t need to adjust anything – widgets should work as they were.
We did our best to make this transition as smooth as possible, however, if you’ll face any issues with your widgets – please create a support ticket, we’ll gladly help you.
 What’s the Best Time to Send Email in 2019? (Data Study)
 The 5 Step Cheatsheet For Email Marketing For Small Businesses