Adding an e-commerce component to your WordPress site is a recipe for smart business growth.
Now, WordPress already has a few different plugins like WooCommerce available if you’re trying to build an online store. But the thing is, WooCommerce is a better fit if you know how to code and want to take advantage of its open source customizations.
If you want to learn more about the pros and cons of both WooCommerce and Shopify, check out our definitive deep dive!
… Which brings us to Shopify. It’s an easier e-commerce solution that you can painlessly integrate with WordPress. There are actually 2 distinct ways to do so, each with its own pros and cons. Below, we’ve prepared detailed instructions on each of them, which you can follow to create your very own store. Take a look!
Adding an e-Commerce Button to WordPress
Here’s the fast, cheap, and easy way to do it: For only $9 per month, you can integrate Shopify buttons to your existing site.
You can also customize whether these buttons bring up an immediate checkout or redirect customers to an external product page – say, on Amazon.
In other words, you won’t have your own, complete store, but you will have selling capabilities through your blog. If you’re already pumping out some high-quality content, this is a great low-effort way to add some sales juice.
One example of a small business fitting Shopify buttons into their small budget can be seen here with Angler Innovations. Part of their strategy for selling innovative fishing gear is through such embedded links on their blog:
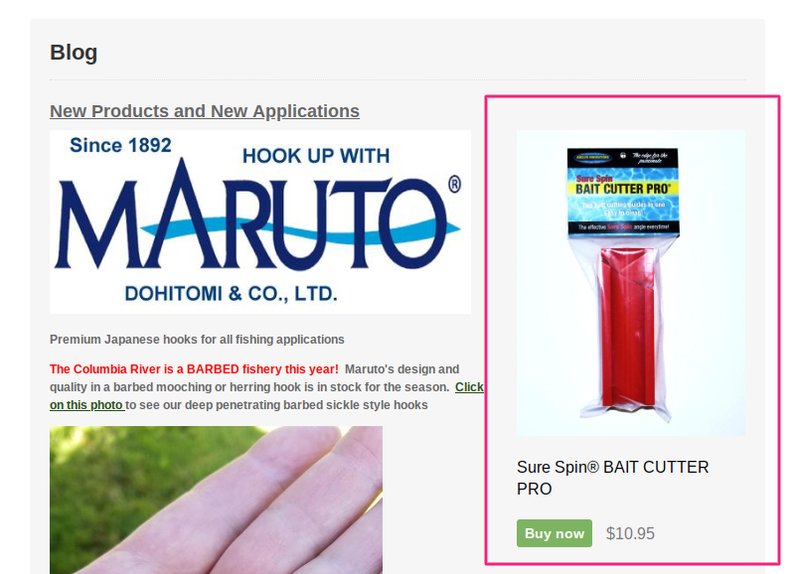
Highlighted next to the content, you can see they’ve added a subtle “Buy now” option.
The core of Angler’s strategy here is connecting useful information with relevant product placement; if anyone reading is interested, making a purchase could not be made any easier on them!
Here’s what else you can expect from the Shopify button…
Pros:
The big one: It’s incredibly cheap. $9 per month for some sales functionality is nothing, especially considering the potential profit you stand to gain. Compared with other Shopify plans (and, for that matter, non-Shopify plans), this plan provides a great bang for your buck.
It’s also quick to hit the ground running. Unlike creating a full store (which we outline below), the buttons are quite simple to integrate and then maintain. And remember, you’re adding them to an existing site that already has an audience; you’re not starting from square one in terms of viewership.
Cons:
Minimal functionality. Simpler choices equate to basic features. You won’t have nearly as many tools at your disposal as you would with a full-on online shop. And you won’t be able to scale up your operations with the same sort of efficiency either.
Limited focus on e-commerce. These buttons typically exist within pages that have ulterior purposes. On a blog, for example, a button will always be secondary to the content it supplements. So you won’t have that singular attention to products you’d get on a structured marketplace.
With that out of the way, here’s the quick step-by-step method behind getting the button up and running:
1. Install the Button
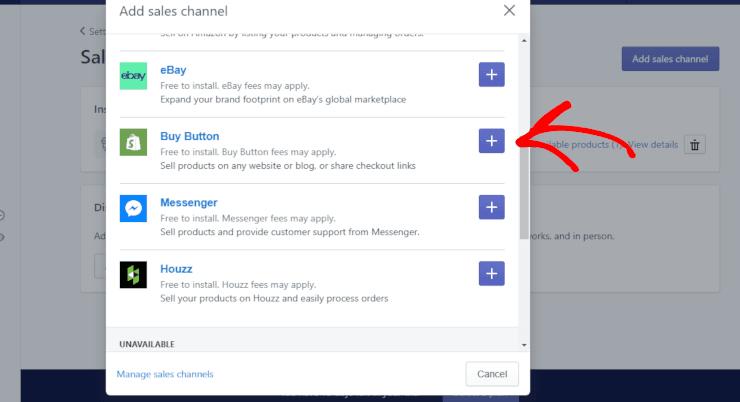
Before we can get to the fun stuff, you need to actually install Shopify’s Buy Button, as shown above.
To get to that screen, access your Shopify Settings, and then click “Sales Channels.” From there, just hit the plus symbol to add the button to your tool chest.
2. Create the Button Design
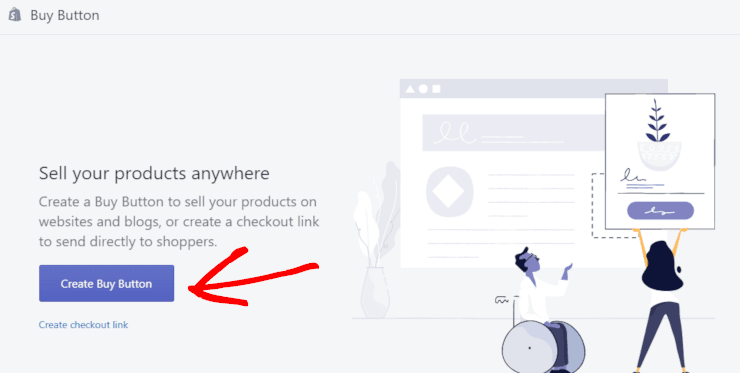
Installing the button takes you to this page where, as the arrow indicates, you can finally create it.
You’ll then be taken to a product design page. As an example of what it looks like, check out this screenshot from a helpful WordPress navigation site:
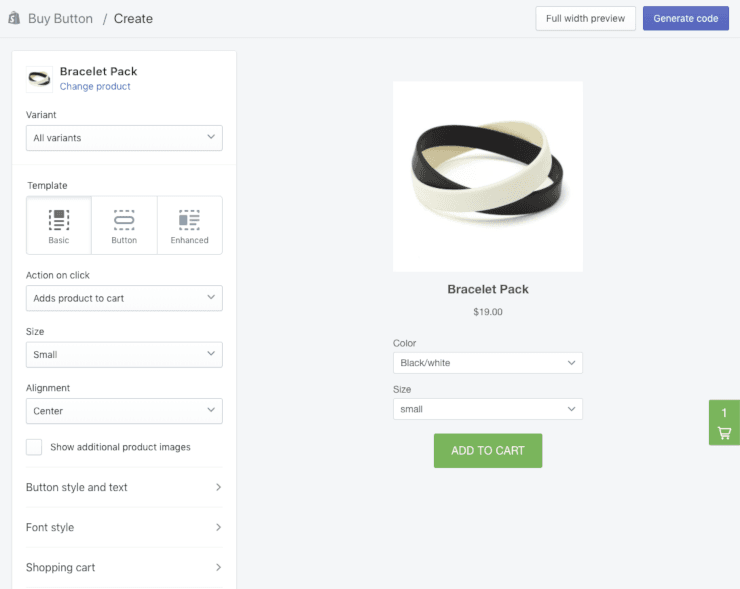
As you can see, this creator allows you to dictate the button’s style, text, alignment, price, and more. And if you look at the top right, you’ll see the last important step.
3. Get Your Button’s Code
Once you hit “generate,” you’ll see something like this pop up:
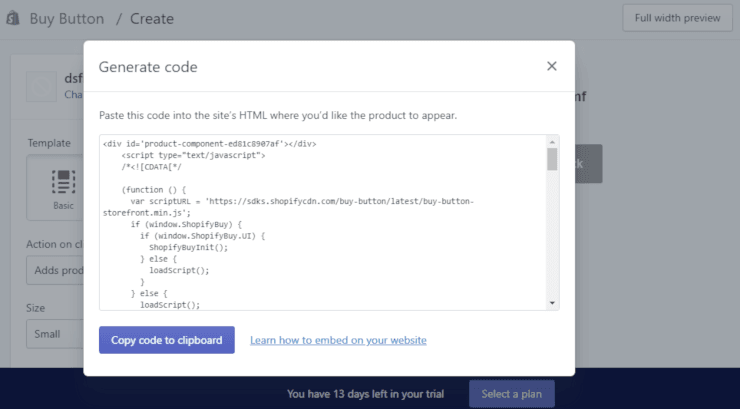
That’s the code you need to input on WordPress to give your button life. So make sure to copy it, and then paste it on whichever page you want it to appear. And presto! You’ve got yourself a fully functional Shopify button.
… But if you’re looking for a little more oomph to your sales integration, you may want this more substantial option:
Creating A Full Store
The button plug-in is nice, but you need a legitimate marketplace if you’re serious about harnessing the e-commerce possibilities afforded by Shopify and WordPress.
With this option, you’re combining a full-fledged blog with a full-fledged store. Unlike before, here you get to truly utilize Shopify’s extensive library of features. And in an ideal world, the content will further drive your sales by directing powerful traffic towards the shop.
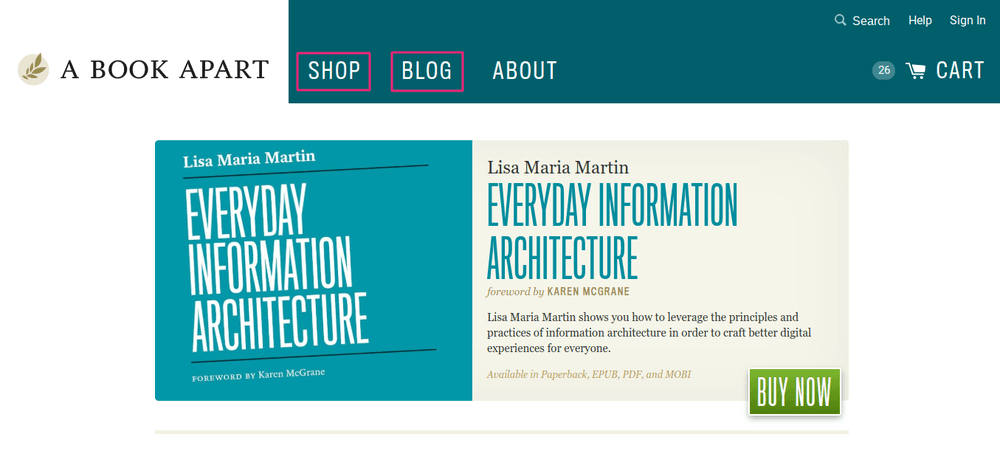
Let’s take a quick look at how educational publisher A Book Apart does it.
Their homepage banner says it all, prominently displaying a “Shop” selection next to its “Blog.”
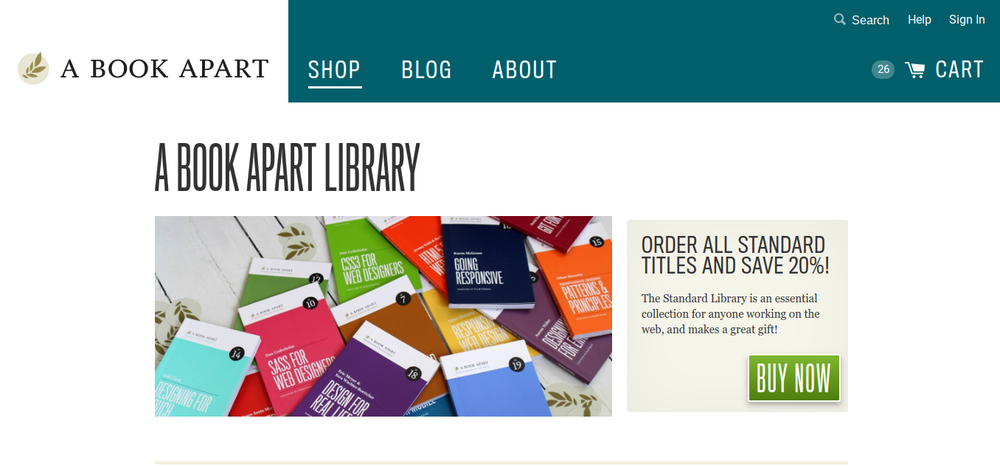
Clicking on “Shop” takes you to a fully operational Shopify store, the top of which is shown here. Note the “Buy Now” call-to-action, the 20% discount offer, and the shopping cart at the top right:
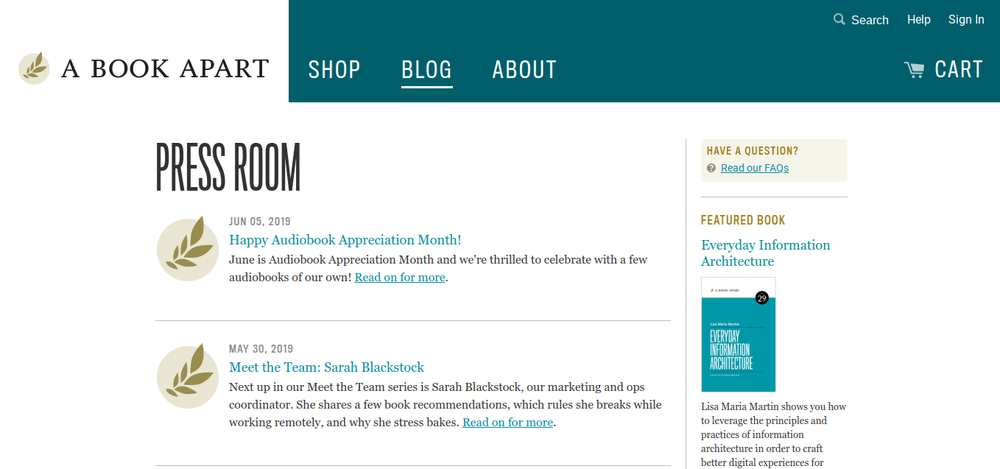
Alternatively, clicking “Blog” brings you to a clean, organized, WordPress-run blog, as such:
All in all, the beauty of this strategy is that it lets you tap into the power of both the world’s leading e-commerce platform and content management system.
Pros:
You have the ability to scale up. To put it bluntly, this will make your business appear much more legitimate than any mere button can. You get the best of both worlds in WordPress and Shopify features that aren’t limited to basic functions. And perhaps most important to your business growth: A treasure chest of easy-to-use Shopify extensions lies at your fingertips.
Advanced content marketing. Essentially, this path allows you to use your blog as part of your sales funnel. By taking advantage of WordPress’s strong content options – from SEO to blog display – you’re optimizing a channel by which you can build your audience
Cons:
This process takes time. For one, it’s not quite as easy as just adding a button (as we demonstrate in the process below). It also requires more regular upkeep to ensure congruence between your commerce and your content; there’s more macro-level work on your plate here.
It’s also more expensive. Obviously, the rest of Shopify’s plans aren’t also $9/month (you can see their plans here, and our infographic guide to navigating them here). Beyond price, this route is also a bigger overall investment on your end, from time allotted to energy spent.
Now that we’ve covered all the surrounding info, let’s run through the step-by-step from the very beginning of the process:
1. Create Your Shopify Account
Of course, you can’t do any of this (button included) without first signing up for Shopify. If you’ve yet to do so, head to the homepage and hit one of the “Start” calls-to-action.
Shopify’s instructions from there on out are pretty clear cut, so we won’t discuss it further here. Once you’ve walked through the registration process, head over to #2:
2. Choose a Host for Your Domain
Now, you need a host website for your domain.
There are a bunch of reliable hosting options out there – Shopify even offers one! – but the online consensus for best choice is Bluehost. It’s cheaper than most options at <$4/month and includes 1 free domain and 1-Click WordPress installation.

If, for some reason, Bluehost doesn’t jive with you, feel free to check out some other options, like Wix, Weebly, InMotion, or HostGator.
3. Connect Your Domain to WordPress
If you do move forward with Bluehost’s domain manager, this part is quite straightforward. They hold your hand through this process, much of which has been optimized specifically for WordPress sites.
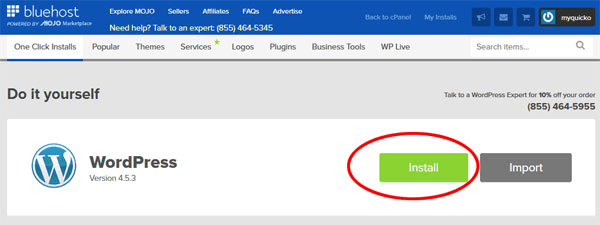
Screenshot credit to MyWifeQuiteHerJob.com
Once you’ve done so, your WordPress site has effectively become a legitimate destination for browsing viewers.
One point of note, though: When setting this up, make sure to use “Wordpress.org” during the installation, as opposed to “.com” or something similar. This “.org” version is the relevant one for our purposes here.
4. Create Subdomains
Whether you’re using Bluehost or an alternative domain manager, part of the goal is linking different parts of your website. This is where subdomains come into play; they are what connect the distinct entities of your blog and your store.
To put it in layman’s terms: If www.convertful.com is your main page, then you’ll make shop.convertful.com the store subdomain.
Or – you can access your Bluehost account’s “Domain Manager” to make a blog subdomain, like so:
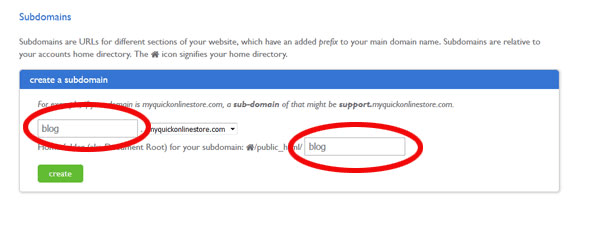
This results in a subdomain of the form “blog.website.com”:

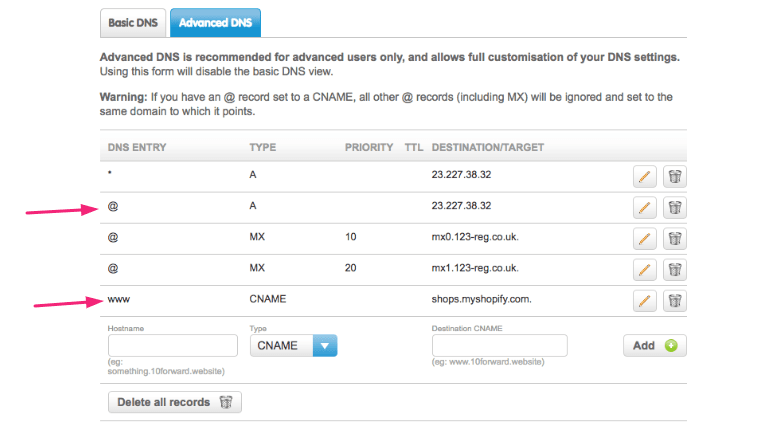
On Bluehost, you’ll find a series of prompts to input that information, but here are a couple of additional need-to-know details. In the DNS Zone editor (found in the “Domains” tab):
- Your A Name should be directing towards your WordPress website IP address
- Your C Name points to your store at shops.myshopify.com
5. Set up Shopify Domains
Now we’re leaving Bluehost and zooming back in on Shopify. Here, head to the online store found under “Sales channels,” and then select “Domains.”
For your primary domain, enter your Shopify store domain. Then head to “Manage domain,” where you’ll find the DNS settings. According to Shopify’s help center, you need:
- Your A Record to lead to Bluehost
- Your C Name to point to shops.myshopify.com
What all of this fancy A name/C name designation ends achieving is getting your shop and/or blog on a separate yet connected domain. Thus, it’s the best way to make sure your WordPress host and Shopify store are synced.
Conclusion
And there you have it! 2 fairly straightforward ways to combine Shopify with WordPress.
Moving forward with one of these methods – particularly the latter – is really just a responsible investment in your business. It lets you simultaneously wield the power of e-commerce and website building to facilitate brand growth you wouldn’t experience otherwise.
None of the options available are particularly expensive, and the value you add in terms of sales and content potential is massive. So – what are you waiting for?
 How to Convert 11% of eCommerce Visitors Using Spin-to-Win Gamification
 How To Choose the Best Shopify Plan for Your Business [+Infographic Inside]
4 Comments. Leave new
Hi Convertful people, nice article! I already done that kind of stuff but I’m stucked to a a crazy question : how to setup FB pixel(s) on that kind of system? One pixel for the shop subdomain and one for the WWW subdomain? Or just one pixel for both? And how to configure that?
Thank you VERY VERY MUCH for your help, I’m lost!
Hi Julien,

you can insert FB pixel code into your widget. For doing this, please, open “Display rules” and paste your code inside the “Tracking pixel code” field.
If you have any other questions, please, create a support ticket
Good guide, but what about the cart alerts being shown when you’re on the Blog? For example, how will shoppers know they have an existing cart if they start reading the blog article. The cart will not follow you to WordPress automatically.
FYI, and related to the comment above, it looks like A book apart is running only on Shopify.