Content Locking
For: eCommerce, Digital Businesses, Bloggers, SaaS
Content locking is a powerful way to turn high-value content into a conversion driver. Instead of giving everything away upfront, you can selectively restrict access to premium pages, downloads, or resources until visitors take a meaningful action, such as creating an account, subscribing to a newsletter, or submitting their contact details.
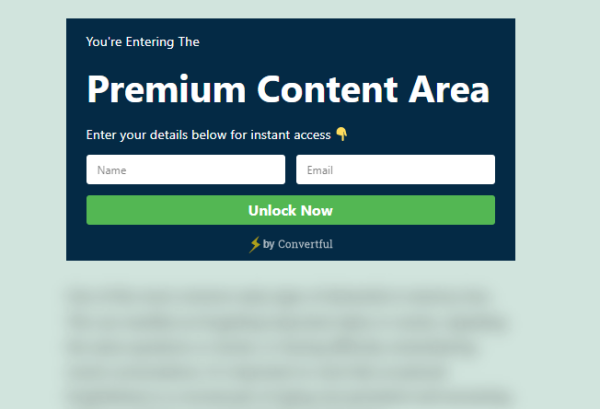
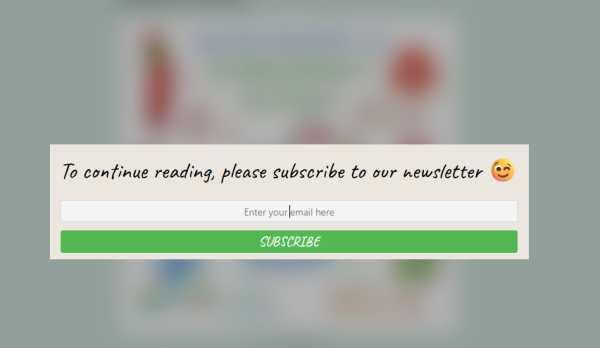
With Convertful, content locking is seamless and user-friendly. You can apply a blur effect to the content behind your widget, clearly signaling that something valuable is waiting to be unlocked. This approach increases engagement while maintaining a smooth browsing experience. Visitors understand exactly what they need to do and why.
Why use content locking?
- Increase lead generation: Encourage visitors to share their email or sign up before accessing premium content.
- Boost perceived value: Locked content feels more exclusive, which can increase conversions.
- Guide user actions: Direct visitors toward the actions that matter most to your business.
- Protect premium resources: Ideal for gated guides, tutorials, templates, or member-only content.

Common use cases
- Bloggers and content creators: Lock in-depth articles, downloadable PDFs, or exclusive tutorials behind an email signup.
- eCommerce stores: Require account creation to access wholesale pricing, special discounts, or product manuals.
- SaaS companies: Gate feature demos, advanced documentation, or onboarding resources to capture qualified leads.
- Digital businesses: Restrict access to courses, webinars, or reports until users complete a form or survey.
How to set up content locking
- Create a widget
- Choose whether you want an inline widget (embedded directly into the page) or a pop-up widget, depending on how prominently you want to block access to the content.
- Design your widget
- Customize the layout, colors, and messaging.
- Clearly explain what visitors need to do to unlock the content (for example, “Sign up to continue reading” or “Enter your email to access this guide”).
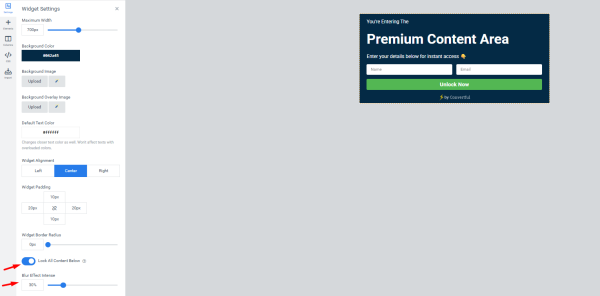
- Enable the blur effect
- In the Widget settings, toggle on the “Enable blur effect” option to visually lock the content behind the widget.
- Adjust blur intensity
- Use the blur intensity slider to choose how visible the locked content should be.
- A stronger blur emphasizes exclusivity, while a lighter blur offers a preview of the content.
- Lock the content based on widget type
- Inline widgets
-
- Enable “Lock All Content Below” and place the widget immediately before the content you want to restrict.
- Everything below the widget will remain blurred until the visitor completes the required action.
-
- Pop-up widgets
- Enable the blur effect in the widget settings.
- Set Close Button Location to “None”.
- Toggle off “Overlay should close the widget” so visitors must interact with the widget to proceed.
- Inline widgets
- Test and optimize
- Preview your page to ensure the content locks correctly and the message is clear.
- Experiment with wording, blur intensity, and widget placement to maximize conversions.